
Embroidery · Size chart
Embroidery Hoop Sizes, Explained
Machine hoops are named by the area the machine can stitch; hand hoops by the diameter of the ring. Here are common sizes side by side, to scale, plus a table that turns your design size into a hoop.
The short answer
On embroidery machines, the hoop name tells you the largest design it can stitch: 4 × 4 in (100 × 100 mm) is the common starter size, with larger fields such as 5 × 7 in (130 × 180 mm), 6 × 10 in (Brother SA441: 6.25 × 10.5 in, about 159 × 267 mm) or 8 × 12 in (200 × 300 mm) on bigger machines. For hand embroidery, round hoops of about 4 to 12 inches cover most projects; pick one whose diameter clears the diagonal of your design after you add about 1/2 in (12.7 mm) of fabric on every side.
Machine embroidery hoops (sewing field)
Sewing field as the maker lists it. Machines only accept hoops made for their own arm or frame holder.
| Size | Inches | Millimeters | Area | Example | Source |
|---|---|---|---|---|---|
| 4 × 4 (100 × 100 mm) | 4 × 4 in | 100 × 100 mm | 16 sq in | Brother SA438 · Janome SQ10b | [1], [7] |
| 5 × 7 (130 × 180 mm) | 5 × 7 in | 130 × 180 mm | 36 sq in | Brother SA439 | [2], [5], [6] |
| 140 × 140 mm | 5.5 × 5.5 in ≈ | 140 × 140 mm | 30 sq in | Janome SQ14 | [8] |
| 140 × 200 mm | 5.5 × 7.9 in ≈ | 140 × 200 mm | 43 sq in | Janome RE20d, RE20b | [9], [7] |
| 6 × 10 (field 6.25 × 10.5 in) | 6.25 × 10.5 in | 159 × 267 mm | 66 sq in | Brother SA441 | [3] |
| 200 × 200 mm | 7.9 × 7.9 in ≈ | 200 × 200 mm | 62 sq in | Janome SQ20b | [7] |
| 8 × 12 (200 × 300 mm) | 8 × 12 in | 200 × 300 mm | 93 sq in | Brother SA447 (sold as 12 × 8) | [4], [6] |
| 230 × 230 mm | 9 × 9 in | 230 × 230 mm | 82 sq in | Janome SQ23 | [10] |
| 200 × 280 mm | 7.9 × 11 in ≈ | 200 × 280 mm | 87 sq in | Janome RE28b | [7] |
| 200 × 360 mm | 7.9 × 14.2 in ≈ | 200 × 360 mm | 112 sq in | Janome RE36b | [7] |
100 × 100 mm
130 × 180 mm
140 × 140 mm
140 × 200 mm
159 × 267 mm
200 × 200 mm
200 × 300 mm
230 × 230 mm
200 × 280 mm
200 × 360 mm
Hand embroidery hoops (inner diameter)
Sizes as sold. The usable area is slightly smaller than the ring.
| Size | Inches | Millimeters | Area | Example | Source |
|---|---|---|---|---|---|
| 4 in round | 4 in | 102 mm Ø | 13 sq in | Elbesee wooden hoop · Nurge ~100 mm | [13], [14] |
| 5 in (12 cm) round | 5 in | 120 mm Ø | 18 sq in | DMC beech wood hoop | [11] |
| 6 in (15 cm) round | 6 in | 150 mm Ø | 27 sq in | DMC beech wood hoop | [11] |
| 7 in (18 cm) round | 7 in | 180 mm Ø | 39 sq in | DMC beech wood hoop | [11] |
| 8 in round | 8 in | 203 mm Ø | 50 sq in | Elbesee wooden hoop | [13] |
| 220 mm (8.66 in) round | 8.66 in | 220 mm Ø | 59 sq in | Nurge wooden hoop | [14] |
| 9 in round | 9 in | 229 mm Ø | 64 sq in | Elbesee wooden hoop | [13] |
| 10 in (25 cm) round | 10 in | 250 mm Ø | 76 sq in | DMC beech wood hoop | [11] |
| 12 in round | 12 in | 305 mm Ø | 113 sq in | Elbesee wooden hoop · Nurge ~310 mm | [13], [14] |
| 12.5 × 20 cm oval | 4.9 × 7.9 in ≈ | 125 × 200 mm | 30 sq in | DMC oval wooden hoop | [12] |
| 18 × 24 cm oval | 7.1 × 9.4 in ≈ | 180 × 240 mm | 53 sq in | DMC oval wooden hoop | [12] |
4 in
5 in
6 in
7 in
8 in
8.66 in
9 in
10 in
12 in
12.5 × 20 cm
18 × 24 cm
Where these sizes come from
- Brother USA Support, “Available hoop sizes” (answer 80009)
- Brother USA, SA439 5 × 7 embroidery hoop (max. embroidery area 5 × 7 in)
- Brother USA, SA441 6 × 10 embroidery hoop: maximum embroidery area 10.5 × 6.25 in
- Brother USA, SA447 12 × 8 embroidery hoop
- Brother Support, PE-Design FAQ: max pattern sizes include 130 × 180 mm, 160 × 260 mm and 200 × 300 mm
- Brother Support, frame types: large 130 × 180 mm, extra-large 200 × 300 mm
- Janome accessories catalog (embroidery hoop table)
- Janome, Embroidery Hoop SQ14 (140 × 140 mm)
- Janome, Embroidery Hoop RE20d (140 × 200 mm)
- Janome, Embroidery Hoop SQ23 (230 × 230 mm)
- DMC, Beech wood embroidery hoop (12, 15, 18, 25 cm)
- DMC, Oval wooden embroidery hoop (12.5 × 20, 18 × 24 cm)
- StitchKits Crafts, Elbesee wooden embroidery hoops (4, 5, 6, 7, 8, 9, 10 and 12 in)
- Nurge, screwed wooden embroidery hoops (100–310 mm diameters)
“≈” marks inch values we converted from the maker’s millimeters (mm ÷ 25.4, rounded to 0.1 in). Area for round and oval hoops is the ellipse area.
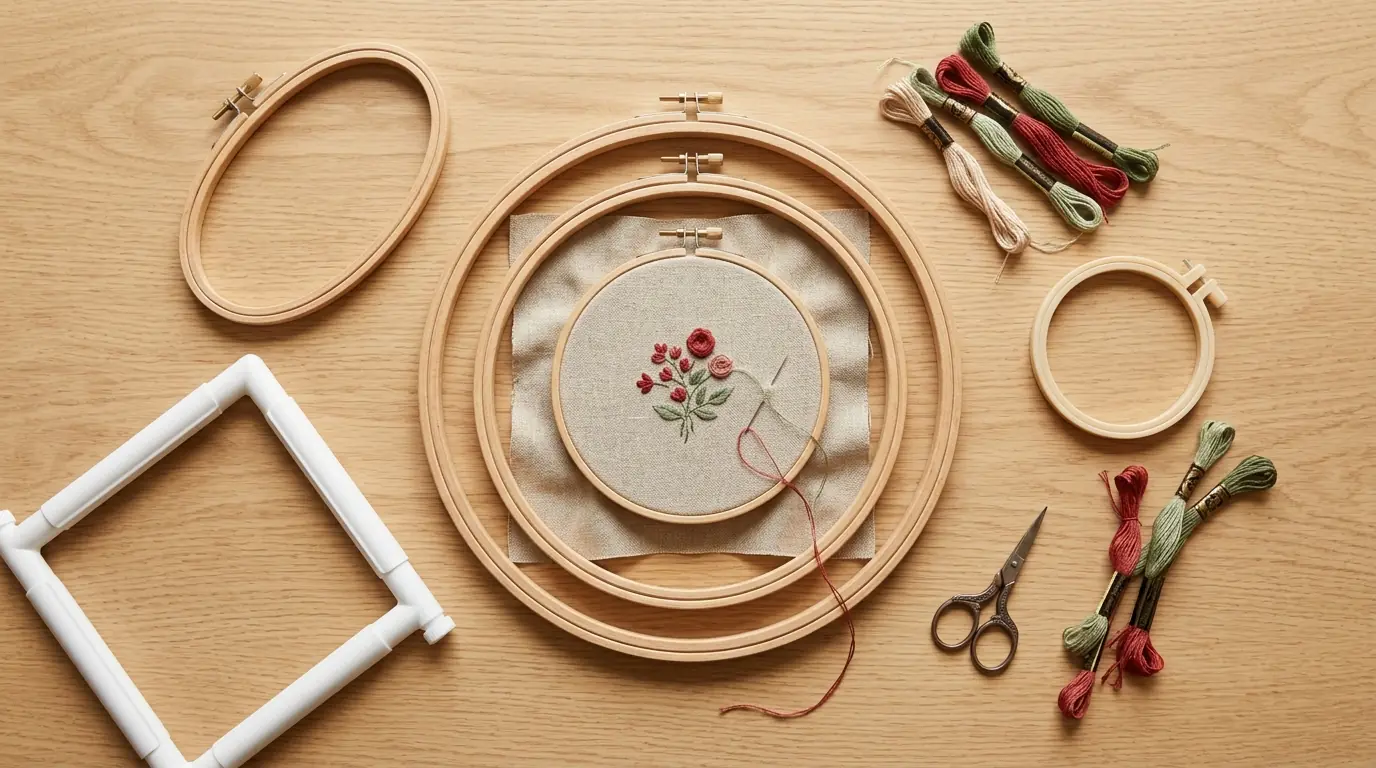
Embroidery hoop sizes mean two different things. On an embroidery machine, the size is the sewing field, the largest area the machine can stitch in one hooping. On a hand hoop, it is the diameter of the ring. That’s why a “5 × 7” machine hoop and a 7 in hand hoop have little in common.
The chart above shows common sizes to scale. Below, we turn your design size into a hoop, list the machine hoops Brother, Bernina and Janome make, compare hoop types and walk through hooping fabric.
Which hoop for your design
Every hoop choice runs through the same three questions.

For hand embroidery, we add about 1/2 in (12.7 mm) of clear fabric between the design and the ring on every side — a common guide rule of thumb, not a maker standard (DMC, Nurge, Elbesee, Brother, Bernina and Janome publish no fixed hand-hoop margin). It gives the needle room at the edge and keeps the ring off finished stitches. A round ring must clear the corners, so we use the diagonal of the design after that margin on every side. Selection uses that unrounded diagonal; only the printed inch and mm values are rounded. The 1/2-in diagonal method is a cautious planning aid for a rectangular design that should sit fully inside the hoop; for round, loose or section-by-section motifs, a smaller hoop often works. Ring sizes: DMC (5, 6, 7 and 10 in), Elbesee whole-inch wooden hoops (4, 8, 9 and 12 in), and Nurge’s metric wooden range (100–310 mm), with 220 mm / about 8.66 in as its own size — not as “8 in”.
| Design (W × H) | Diagonal of design plus ½ in on every side | Smallest round hoop | Oval option |
|---|---|---|---|
| 2 × 2 in | 4.2 in (108 mm) | 5 in (12 cm) | 12.5 × 20 cm |
| 3 × 3 in | 5.7 in (144 mm) | 6 in (15 cm) | 12.5 × 20 cm |
| 3 × 4 in | 6.4 in (163 mm) | 7 in (18 cm) | 18 × 24 cm |
| 4 × 4 in | 7.1 in (180 mm) | 8 in | 18 × 24 cm |
| 4 × 6 in | 8.6 in (218 mm) | 9 in | none of the two |
| 5 × 5 in | 8.5 in (216 mm) | 9 in | none of the two |
| 6 × 8 in | 11.4 in (290 mm) | 12 in | none of the two |
A 4 × 4 in design needs about 7.1 in (179.6 mm) with the margin. DMC’s ring sold as 7 in is stated as 180 mm, so it just fits on paper (0.4 mm spare); we suggest 8 in because the usable inner size is a little smaller than the stated size. An oval, a slimmer corner margin, or moving a 7 in hoop once are alternatives.
For machine embroidery, the design simply has to fit inside the sewing field; the machine won’t stitch outside it. We let each design turn 90 degrees if that helps. Keep a little spare inside the field too: machine designs are usually sold a few millimeters inside the named hoop, and leaving about 3 mm clear of the field edge is a common working habit so the presser foot and frame lips don’t crowd the outer stitches.
Recommendations below apply only to the hoops listed and depend on your exact machine model. For oval hoops, check the design outline in the software or against the clear plastic template (see BERNINA’s software help on hoop templates).
| Design (W × H) | Smallest Brother hoop | Smallest Janome hoop | Smallest Bernina hoop |
|---|---|---|---|
| 2 × 0.75 in | 1 × 2.5 in (SA437) | SQ10b (100 × 100 mm) | Small (72 × 50 mm) |
| 3.5 × 3.5 in | 4 × 4 in (SA438) | SQ10b (100 × 100 mm) | Medium (130 × 100 mm) |
| 4.5 × 4.5 in | 5 × 7 in (SA439) | SQ14 (140 × 140 mm) | Large Oval (255 × 145 mm) |
| 4.5 × 6.5 in | 5 × 7 in (SA439) | RE20d (140 × 200 mm) | Large Oval (255 × 145 mm) |
| 5.5 × 7.5 in | 6 × 10 in (SA441) | RE20d (140 × 200 mm) | Large Oval (255 × 145 mm) |
| 7 × 10 in | 7 × 12 in (SA440) | RE28b (200 × 280 mm) | Maxi (400 × 210 mm) |
| 7.5 × 13 in | split the design | RE36b (200 × 360 mm) | Maxi (400 × 210 mm) |
The Brother column draws on the help-page list plus the SA441 and SA447 product pages; your model may take fewer. Bernina sizes are the maximum embroidery areas from its hoop brochure; Bernina notes that not every hoop fits every machine. A 5.5 × 7.5 in design misses the 5 × 7 field by half an inch each way and fits the SA441 field of 6.25 × 10.5 in, which is why designs are sold “for 5 × 7” or “for 6 × 10” rather than “about that size”.
What a machine hoop size means
A machine hoop’s name describes its sewing field; the plastic frame itself is bigger. A design sold “for a 5 × 7 hoop” fits inside that field.
Your machine sets the limit. Brother’s help page lists seven hoops and frames for one machine family, from a 1 × 2.5 in monogramming hoop to a 7 × 12 in extra-large hoop, and adds: a larger hoop does not increase the maximum embroidery space. Product pages also list a 6 × 10 in hoop (SA441) and an 8 × 12 in hoop (SA447, sold as 12 × 8). SA441’s maximum embroidery area is 10.5 × 6.25 in (about 267 × 159 mm), so “6 × 10” is the name, not the exact field. SA447 names the hoop but gives no field; Brother’s frame FAQ lists the extra-large field as 200 × 300 mm. Support FAQs give 130 × 180 mm for the 5 × 7 class; a PE-Design FAQ lists 160 × 260 mm as a pattern size for that class. A machine with a 4 × 4 in field can’t stitch a larger design in one go, whatever hoop you attach.
Border hoops are the exception: Brother’s 7 × 4 in border hoop and 12 × 4 in continuous border frame stitch long borders by re-clamping in steps, but each step stays within the machine’s field.
Machine hoops by brand
Sizes confirmed on maker pages and brochures. Each brand’s hoops attach to its own machines; even within one brand, check the model list on the hoop’s page.
- Brother: 1 × 2.5 in (SA437), 4 × 4 in (SA438), 5 × 7 in / 130 × 180 mm (SA439), 6 × 6 in (SA448), 6 × 10 in (SA441; field 6.25 × 10.5 in, about 159 × 267 mm), 7 × 12 in (SA440), 8 × 12 in (SA447, sold as 12 × 8; 200 × 300 mm field per Brother’s frame FAQ), plus the 7 × 4 in border hoop and 12 × 4 in continuous border frame.
- Bernina: Small 72 × 50 mm, Medium 130 × 100 mm, Large Oval 255 × 145 mm, Midi 265 × 165 mm, Mega 400 × 150 mm, Maxi 400 × 210 mm, Jumbo 400 × 260 mm and the Medium Clamp hoop 215 × 215 mm.
- Janome: SQ10b 100 × 100 mm, SQ14 140 × 140 mm, RE20b and RE20d 140 × 200 mm, SQ20b 200 × 200 mm, SQ23 230 × 230 mm, RE28b 200 × 280 mm and RE36b 200 × 360 mm.
Other brands follow the same idea. If your machine isn’t Brother, Bernina or Janome, the hoop list in its manual is the source that counts.
Magnetic frames clamp fabric and stabilizer with magnets instead of a screw ring, which helps thick towels, quilts and items that are awkward to hoop the usual way. Brother lists magnetic frames such as 180 × 130 mm (7 × 5 in) and 300 × 180 mm (about 12 × 7 in) in its accessories catalog. Third-party magnetic systems exist too; match the frame to your machine’s arm and to the field it can actually stitch.
Inches, millimeters and rounding
Keep the sales name and the stated size apart. A hoop sold as “5 in” is not always exactly 5 × 25.4 = 127 mm: DMC labels that size 12 cm / 5 in (120 mm). Our hand-hoop picks use the maker’s stated mm or inches, not the sales nickname treated as exact. The same split appears on machines: Brother’s SA441 is sold as 6 × 10 in, while the product page states a 6.25 × 10.5 in field.
Makers often name hoops in inches but build them in millimeters. A “4 × 4” field is 100 × 100 mm, a little under 4 inches. Janome lists most hoops in millimeters; where we show inches for those, we converted (mm ÷ 25.4, rounded to 0.1 in) and marked them with “≈”. When a design file and a hoop disagree by a millimeter or two, trust the millimeters.
Hand hoops: pick by the design
Hand embroidery hoops are sold by diameter. DMC’s beech wood hoops come in 12, 15, 18 and 25 cm (5, 6, 7 and 10 in); its ovals in 12.5 × 20 and 18 × 24 cm. Elbesee fills the whole-inch gaps from 4 through 12 in. Nurge runs 100–310 mm; its 220 mm ring (about 8.66 in) is its own metric size, not an Elbesee 8 in / 203 mm hoop. Choose a ring a little larger than the design so it holds fabric around the motif instead of crushing stitches.

Larger designs don’t need a giant hoop: stitch one area, then move the hoop. A mid-size ring you move is often easier to hold than one that fits everything. Oval hoops suit tall or wide designs and are often used to display finished work.
If you plan to show the piece in its hoop, pick that display hoop before you start so the design sits centered with even space around it.
Hoop types: wood, plastic, Q-Snap and spring

- Wooden screw hoops are the classic: an inner and an outer ring, with a screw on the outer ring setting the tension. DMC’s beech hoops have a slotted brass screw, so you can tighten with a screwdriver, which is kinder on your hands. They double as a display frame.
- Plastic screw hoops work the same way, are light and don’t snag. Many have a lip on the inner ring that helps grip slippery fabric.
- Q-Snap frames are square or rectangular frames of plastic tubes with snap-on clamps. Yarn Tree’s Q-Snap catalog and independent retailers list 6 × 6, 8 × 8, 11 × 11, 11 × 17 and 17 × 17 in; the maker site notes smaller frames from 6 × 6 to 20 × 20 in. Side bars swap: a 6 in pair and an 8 in pair make an 8 × 6 frame. Their straight sides suit cross stitch on Aida, which is stitched in a grid.
- Spring hoops have a metal tension spring inside a plastic frame. Nurge, which makes them, describes them as ideal for free machine embroidery and usable for hand work too, with no screw to tighten. They go on and off quickly and sit flat under the presser foot.
Machine hoops are a separate family: rigid plastic frames, sized by sewing field and made for one machine’s arm. You can’t swap a hand hoop in.
How to hoop fabric for hand embroidery
DMC describes three steps, and they’re worth doing in order:
- Loosen the screw and separate the rings.
- Lay the inner ring on a flat surface, center the fabric over it and press the outer ring down over both. Start tightening so it grips.
- Work around the hoop, gently pulling the fabric edges until it is completely taut, and tighten the screw a little at a time. It should sound like a drum when you tap it.
While you stitch, repeat step three now and then; fabric relaxes. DMC also suggests wrapping the inner ring with bias binding to protect the fabric and reduce slipping.
For machine embroidery, the principle is the same, but the fabric is hooped together with stabilizer and must not be stretched out of shape, or the design distorts once it is released. Follow the hooping steps in your machine’s manual.
Common hoop mistakes
- Buying a hoop your machine can’t use. Check the model list first; another brand’s frame won’t attach.
- Expecting a bigger hoop to give a bigger design. The machine’s field is the limit.
- Measuring only the width. On a round ring, the corners hit first — check the diagonal of the design plus margin on every side.
- Leaving work in the hoop. DMC warns it can leave creases that are hard to remove.
- Pulling fabric unevenly. Tighten in small steps all around, or the weave skews and stitches pucker when the fabric relaxes.
- Cutting fabric to hoop size. Fabric needs to reach well past the rings so you have something to pull on.
Cross stitch: work out the size first
In cross stitch, the design size depends on the fabric. Divide the stitch count by the fabric count: a 70-stitch design on 14-count Aida is 5 in wide. Our Cross Stitch Calculator does this for width and height and adds the fabric margin, so you know the size before you pick a hoop or Q-Snap.
Where to keep your hoops
Hoops nest inside each other, so a set takes little space. Our craft room storage ideas cover keeping floss and fabric out of the light, and sewing room ideas help you plan a corner where an embroidery machine fits next to everything else.
Before you buy a hoop
Questions people ask
Is a 4 × 4 hoop really 4 by 4 inches?
Close. Makers list 4 × 4 hoops as 100 × 100 mm, which is about 3.9 in on each side. Designs sold for 4 × 4 hoops are sized to fit that field.
Can I use another brand's hoop on my machine?
Only if the hoop is made for your machine's embroidery arm. Brands use different attachments, and even models from one brand differ. Check the maker's compatibility list.
Does a bigger hoop let my machine stitch bigger designs?
No. Brother says it plainly: a larger hoop does not increase the maximum embroidery space. The machine's own field is the limit, whatever frame you attach.
What size hand embroidery hoop should I start with?
A 6 in (15 cm) round hoop is an easy first size: it just fits a design of about 3 × 3 in once you add 1/2 in (12.7 mm) on every side (about 6 mm of spare diameter) and is small enough to hold in one hand.
What size hoop do I need for cross stitch?
Work out the finished size first: stitches divided by fabric count. A 70-stitch design on 14-count Aida is 5 in wide. Then pick a hoop or Q-Snap that clears it, or move the hoop as you go.
Should I leave fabric in the hoop between sessions?
No. DMC advises against leaving work in the hoop for long, because it can leave creases that are hard to remove. Take it out when you stop.
Sources and changes
- Brother USA Support, Available hoop sizes (answer 80009): SA437 1 × 2.5 in, SA438 4 × 4 in, SA439 5 × 7 in, SA448 6 × 6 in, SA440 7 × 12 in, border hoop 7 × 4 in, continuous border frame 12 × 4 in; a larger hoop does not increase the maximum embroidery space
- Brother USA, SA439 5 × 7 embroidery hoop (maximum embroidery area 5 × 7 in)
- Brother USA, SA441 6 × 10 embroidery hoop: maximum embroidery area 10.5 × 6.25 in
- Brother USA, SA447 12 × 8 (8 × 12) embroidery hoop (product name; field in mm from the Brother frame FAQ)
- Brother Support, PE-Design FAQ: maximum pattern sizes include 100 × 100 mm, 130 × 180 mm, 160 × 260 mm and 200 × 300 mm
- Brother Support, frame types: large embroidery frame 130 × 180 mm (5-1/8 × 7-1/8 in), extra-large 200 × 300 mm
- Brother accessories catalog: Magnetic Frame 180 × 130 mm (7 × 5 in) and Magnetic Frame 300 × 180 mm (~12 × 7 in)
- Janome accessories catalog: SQ10b 100 × 100 mm, RE20b 140 × 200 mm, SQ20b 200 × 200 mm, RE28b 200 × 280 mm, RE36b 200 × 360 mm
- Janome, Embroidery Hoop SQ14 (140 × 140 mm)
- Janome, Embroidery Hoop RE20d (140 × 200 mm)
- Janome, Embroidery Hoop SQ23 (230 × 230 mm, 9 × 9 in)
- DMC, Beech wood embroidery hoop: 12 cm/5 in, 15 cm/6 in, 18 cm/7 in, 25 cm/10 in; brass screw with a slot for a screwdriver
- DMC, Oval wooden embroidery hoop (12.5 × 20 cm, 18 × 24 cm)
- DMC, How to use an embroidery hoop: center fabric over the inner ring, tighten gradually until drum-tight, re-tighten while stitching, wrap the inner ring with bias binding, don't leave work in the hoop
- BERNINA Embroidery Brochure 2023, hoop list: Small 72 × 50 mm, Medium 130 × 100 mm, Large Oval 255 × 145 mm, Midi 265 × 165 mm, Mega 400 × 150 mm, Maxi 400 × 210 mm, Jumbo 400 × 260 mm, Medium Clamp 215 × 215 mm; not all hoops are compatible with all machines
- BERNINA, Large Oval Embroidery Hoop (max. embroidery area 145 × 255 mm)
- BERNINA Embroidery Software help, Hoops & templates: clear plastic template overlay and on-screen hoop template for aligning the design in the hoop (including oval hoops)
- Nurge, Spring Tension Hoops 8 in: a metal tension spring inside a plastic frame, perfect for free machine embroidery
- Nurge, screwed wooden embroidery hoops: diameters 100 mm (3.93 in) through 310 mm (12.20 in)
- StitchKits Crafts, Elbesee wooden embroidery hoops in 4, 5, 6, 7, 8, 9, 10 and 12 in
- Stitcher, Elbesee wooden embroidery hoop range including 4, 8, 9 and 12 in
- Threaded Needle, Q-Snaps: 6 × 6, 8 × 8, 11 × 11, 11 × 17, 17 × 17 in; side bars interchangeable
- Yarn Tree (Q-Snap catalog): 6 × 6, 8 × 8, 11 × 11, 11 × 17 and 17 × 17 in frames; measurements are outside dimensions
- Q-Snap, manufacturer site: smaller frames from 6 × 6 to 20 × 20 in; now part of Yarn Tree
What changed
- Chart built from maker sources (Brother, Janome, DMC).
- Full guide: design-to-hoop tables, Brother and Bernina sizes, spring hoop source, hoop types, hooping steps, mistakes and FAQ.
- Review fixes: Elbesee/Nurge round sizes 4–12 in in the hand table; diagonal-of-enlarged-design wording with inch values; Brother 5×7, 6×10 and 8×12 with mm in chart and text; second Q-Snap source; magnetic-frame note; FAQ and margin wording tightened.
- SA441 field corrected to 6.25 × 10.5 in per Brother product page; SA447 name vs. mm source separated; 4 in and 12 in hand hoops added to the size chart.
- Reader feedback: 1/2 in = 12.7 mm for diagonal math (display rounded after selection); 4 × 4 suggests 8 in though 7 in just fits on paper; Nurge 220 mm row separate from Elbesee 8 in; sales name vs stated size; machine-table model/oval-template note (BERNINA software help).